Monday, April 6, 2015

Chocolate Chip Cookie Dough


Ever since I was a little kid I have been eating Nestle Tollhouse Chocolate Chip Cookies. They are simply the best CCC recipe I've ever found. I've tried branching out. I have. But nothing compares. It must be the nostalgia I feel when I make them. Growing up it seemed like my Mom made these cookies every Sunday after we came home from church. I am pretty sure they are one of the very first things I learned how to cook.


The recipe can be found on any bag of Nestle Chocolate Chips. I don't own it, so I'm not going to post it. Instead, what I'm going to focus on is how to take this common recipe and make sure your cookies aren't just good. But fantastic. It has to do with a few of the main ingredients and how you treat them. But I think you will notice a huge difference if you change your technique just a little bit.


The 4 main ingredients that affect how good your cookies turn out are:

Butter

Sugar

Vanilla

Eggs

Are you ready to have your Chocolate Chip Cookie world rocked?


Let's talk Butter. I'll be honest it's one of my favorite ingredients, I'm constantly amazed I don't weigh 500 lbs from the amount of butter I go through in my house. Literally in my freezer I have a whole shelf of butter. So that I always have it. It must be the Southerner in me coming out.

I always use Sweet Cream Salted Butter unless the recipe specifically calls for unsalted. You can use any brand pretty much. I currently alternate between Land 'O Lakes and Kirkland. Both have given me great results. I don't like to use specialty butters like Kerrygold for baking. That type of thing is better suited to go on top of bread. Not in it.

So the important thing to do with your butter when making cookies, or baking in general unless you're making pie. Is to have it be room temperature. Trying to use frozen or refrigerated butter when making cookies is a terrible idea. On the opposite spectrum of that I also disapprove of using completely melted butter. They don't yield the proper texture. You want your butter to be pliant. Leave it on the counter until you can make a finger indent in it. Then it's ready for use!


Contrary to the butter, where I don't mind using generic brands. I am a bit of a vanilla snob. So much so that I use homemade vanilla. I'll be showing you the technique for that later this month so stay tuned! The specific batch I'm using right now was home made by my Mom. Using vanilla beans and Courvoisier. It is by far superior to just regular old generic vanilla. I swear to you. You can taste the difference. Use a good vanilla!!


Finally the Sugar and Eggs. Sugar doesn't matter until you mix it with the Butter. For Eggs, I recommend using ones at room temperature. They will be kinder to your batter and not shock it if they are room temperature as opposed to cold. And that will make a difference. I promise.

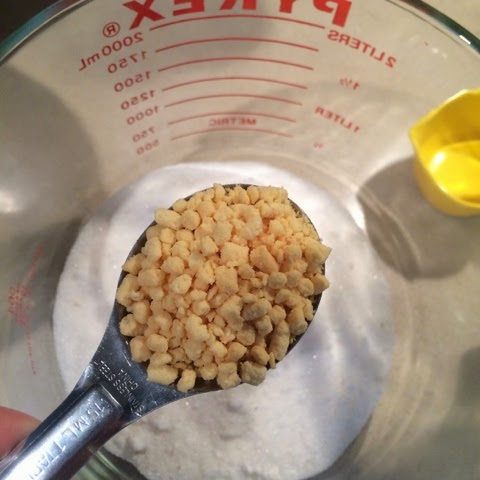
When you start making your dough. The very first step is combining the Sugar, Vanilla and Butter.
The biggest mistake people make when mixing these ingredients is that they don't do it long enough. This will leave you with cookies that don't rise properly, that are flat and sticky. It is so important to cream your Sugar and Butter long enough for them to properly incorporate. It changes the chemical makeup of your cookie and gives you a much fluffier and creamy dough.


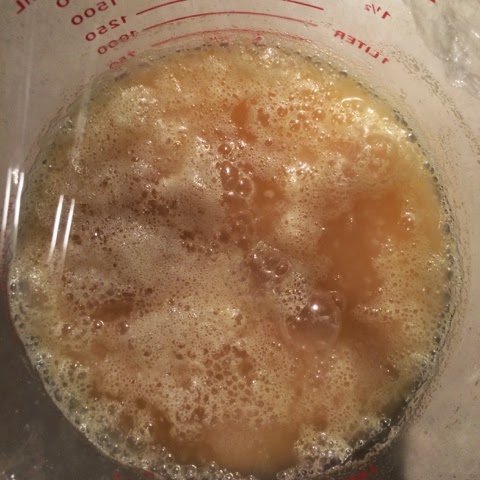
This is about the point everyone gets to. The ingredients look combined. But I promise. They aren't done yet! Stop at this point and scrape down the sides of your bowl. Pinch the dough between your fingers. It will feel gritty. It will still have a brown hue to the dough as well. When butter, vanilla and sugar are properly creamed they will be a lighter color. The dough is brown because the brown sugar and vanilla is not incorporated! Do a pinch test. The dough will separate very easily and feel greasy.


Keep mixing the dough until it is lighter in color and when pinched it feels thicker.


When the dough is fully mixed it should look like this:


Once the dough has reached this consistency you can add the Eggs and then the Flour mixture and the chocolate chips. By doing all the heavy mixing up front you won't end up with stiff or heavy batter after adding the Flour.

Often the flour mixture gets over beaten because you are trying to get that perfect texture. From now on, if you do your mixing up front you should be able to just beat the Flour in until its incorporated. This is what will keep your batter light.


All that's left to do is grab a spoon and enjoy.

Or you can bake them.
But my batter seems to rarely get that far...


Thursday, April 2, 2015

Let's Get Technical


One of the things I've learned about cooking over the years is that some items require a certain technique to achieve perfection, and that practice makes perfect. Part of dump cooking is just being able to throw things together and then seeing if you like it. But I also like to take some of the tried and trues and perfect them. This month I want to focus on a few basic techniques that will transform the ordinary into extraordinary. These are simple things that change the outcome of some basic foods I love.

Also this month is the Launch of an amazing Online Magazine called Foundation Magazine. Go check it out for a little uplifting in your daily life. I'll be contributing to the magazine occasionally. It is a very inspired project by one of my close friends, the lovely Miss Gentri Lee. You can check it out here!

Thursday, March 5, 2015

Potato Sourdough Cinnamon Rolls


If you live anywhere in the Mid Atlantic you are more than likely snowed in right now, and have been every weekend for the last month! Since I'm a bit behind on my posts anyway, I thought I'd put up my Mom's delicious Potato Sourdough Cinnamon Rolls on this lovely snow day. Maybe they can be a fun treat for you and yours while stuck inside! If anything getting the oven going will help heat your house up!

Use the Potato Sourdough starter I showed you here.

To make the dough follow the beginning steps I showed in the Sourdough Cheese Rolls. I'll post a refresher below.

In a bowl combine  the following

1/3 c sugar
1 Tbs salt
1 c starter
1/3 c corn oil
1 1/2 c warm water
6 c bread flour
1 tsp (heaping) yeast

Beat it all together with a dough hook attachment on your mixer until it is only sticking to itself. You want a soft and pliant dough that is sticky, but not messy. You made need to add a little more water depending on how your dough looks. Turn the dough into a lightly oiled bowl and let it rise covered with a damp towel in a warm and non drafty area. (The inside of the oven works great!)

Once you have your dough, gently roll it out into a rectangular shape. Take room temperature butter and spread over the entire surface and then sprinkle with cinnamon sugar.


 Roll the dough up to form a log and then cut into 1 1/2 inch thick slices. 


Place the rolls flat into a lightly greased baking pan. Let them rise again for another 1-2 hours. They should puff up and fill the pan more. 


Bake at 350 until golden on top. About 25-30 minutes. Enjoy plain or with your favorite icing on top!


Tuesday, March 3, 2015

Potato Sourdough Cheese Rolls


One of my favorite things to make with my Momma's Potato Sourdough starter is these amazing Cheese Rolls. They are soft and warm and have melted cheese in the middle. 
Be still my heart. 
Carb Heaven. 

Today I'm featuring these cheese rolls from heaven. If you missed how to make the starter for this dough go here.

When you are ready to make your bread pull your starter out and in a large bowl combine the following:

1/3 c sugar
1 Tbs salt
1 c starter
1/3 c corn oil
1 1/2 c warm water
6 c bread flour
1 tsp (heaping) yeast

This will make your dough. You want to beat it with the dough hook attachment until the bowl is clean as shown below. You may have to add a little more water. You are looking for the dough to be soft and pliable, but sticking to itself. You don't want it stuck all over the hook or the mixing bowl.

Cover the dough and let it rise. It should double in size. I use a large bowl with a little olive oil in the bottom. I covered it with a slightly damp light cloth and stuck it in my oven.


Once your dough has risen ( maybe about 1-2 hours. It should double in size) You can roll it out. You are going to eventually end up with a log, so try and make a large rectangle like shape.  Dump any type of shredded cheese you like all over the rolled out dough.


Roll it up like this and then cut it into about 1 inch thick slices. 


The cheese should be in the center of the roll. To make them round and puffy on the top instead of flat like a cinnamon roll take the rolls and bend and roll as follows. 


Place the rolls in a lightly greased muffin tin. Let them rise again until they have cuffed up and fill the muffin tin and go over a little.
Sprinkle some additional cheese on top, then bake them until the cheese on top is golden. About 20-30 minutes at 350 F.


Enjoy warm with your favorite dinner. Or just by themselves slathered in butter. Don't forget to share. I know it's hard.


Saturday, February 14, 2015

Momma's Potato Sourdough Starter

Growing up my Momma made the BEST cinnamon rolls and dinner rolls. I can remember her baking in our galley kitchen and every surface was covered in jelly roll pans lined with dozens of cinnamon rolls rising. And oh man, when she would put them into the oven to bake? The smell of cinnamon and sugar was like a calling from heaven. The whole house became warmer and cozier somehow with that smell coming from the kitchen. There is something about home made bread, of any kind that just makes a house feel like a home!

So today, I'm going to share with you my Momma's potato sourdough starter. It can be used for any type of sourdough bread. The two I'll be featuring this month are Cinnamon Rolls and Cheesy Dinner Rolls. But today we'll just cover the basics of the starter.


The starter I am going to show you how to make is super easy and very versatile.

Sourdough Starter
Ingredients:
(These are estimations, you may need a little more, or a little less)
1 tsp dry yeast
1 1/3 c sugar
6 Tbs instant potato flakes*
2 c warm water (NOT from the tap. Use filtered water, otherwise you might kill the yeast.)
1/2 tsp salt

*This go around I used dehydrated potato pearls from food storage and because they are pre salted I skipped adding the salt.

Combine all the ingredients in a glass bowl and mix well. Do not use a metal bowl or spatula. It will leave a taste in the starter that is most unpleasant.


Let the starter stand for 1 to 3 days in a warm draft-free place (I used my oven turned off), covered with cling film with a small edge turned back so it can breathe. Remember yeast is a living thing and needs air to breath and grow.


The surface should get bubbly, stir it every once in awhile so that the yeast continues to "eat" all the ingredients and grow.


There are a few options from here for how you can proceed.

Option 1:
If you don't need rolls or the dough the same day you made the starter than you can refrigerate and let the mixture rest, stir and feed it every 5-7 days. As the starter matures over time, a clear to light yellow liquid may form on top, just stir it in.

To Feed Starter do the following:
Add -
2/3 c sugar
3 Tbs potato flakes
1 c warm water
1/4 tsp salt (depending on potato flakes used)

Mix well and let it stand at room temperature for 8-10 hours. It should be very bubbly. Then remove one cup to make bread with and return the rest to the refrigerator.

Option 2:
If you want to use the starter to bake the same day it is possible. You will have to let the yeast grow and become bubbly, stirring occasionally just as before. When you are ready to make your bread pull your starter out and in a large bowl combine the following:

1/3 c sugar
1 Tbs salt
1 c starter
1/3 c corn oil
1 1/2 c warm water
6 c bread flour
1 tsp (heaping) yeast

This will make your dough which you can then either bake as a load, or turn into dinner rolls or cinnamon rolls like I did.

Stay tuned for how to turn this starter into the most amazing cinnamon rolls and cheesy dinner rolls! 

Monday, February 9, 2015

Creamy Parmesan Spread


Hello friends and fellow cooks! Today we are focusing on my all time favorite spread. It is creamy, tangy, and can be used in so many delicious ways! My creamy parmesan spread is great plain, on a sandwich, or as a salad dressing. This is a true dump recipe. I've given measurements below, but they aren't necessary. This is more about taste and texture. So make sure you sample it lots to get it just right!


Creamy Parmesan Spread
Prep time: 10 min

Ingredients:
1/2 Cup mayo
1/4 Cup grated parmesan cheese (parmesan reggiano is the best!)
2 tbs greek yogurt*
2 tbs milk
2 cloves garlic, minced finely
1 tsp minced fresh parsley
1/2 tsp lemon juice

This recipe is all about taste. It's got a sharp flavor to it from the Parmesan and the garlic. To get the garlic minced really finely I use a micro plane grater. It works great. I also do the cheese the same way. 

Mix everything together in a bowl. Once mixed taste it to see how the favors are melding. If you feel like it's too thin add a little more yogurt or cheese. I usually end up adding more cheese cause I like it to be chunky and I add more garlic because it's my favorite! 


This is about the consistency of mine. 


My favorite way to enjoy this spread is on a plain baguette. It's so good and highly addicting. You've been warned! 

Happy eating!

Monday, February 2, 2015

English Muffin Bread with Cinnamon Honey Butter


One of my favorite breakfast breads is English Muffin Bread. It's so good toasted and slathered in fresh made Cinnamon Honey Butter. Today I am going to show you how to make both! And then you will never be able to settle for store bought English muffins again!

This English Muffin bread doesn't require a lot of fancy baking skills. You literally dump everything into a bowl, mix it up, let it rise, and then bake it. My type of bread! On more than one occasion I have given this bread to friends and neighbors and they always rave about how good it is.

Start by figuring out how many loaves of bread you want to make. I always end up making a large batch of this bread because I am usually giving some away, but i'll give you the measurements for 2 loaves below.


English Muffin Bread

Makes: 2 loaves
Prep time: 1 hr 15 min
Cook time: 40 minutes, or until golden

Ingredients:
2 3/4 C warm water*
1 1/2 package rapid rise yeast
1 Tbsp salt
5 1/2 cups Flour

* Don't use hot water as it will kill the yeast! Remember yeast is alive, we need it to grow so that our bread rises.

Start by taking all of your ingredients and dumping them into your mixing bowl. You can do this by hand, but it is much easier if you have a KitchenAid or some type of mixer and use your dough hook attachment. If you don't have a stand mixer of some type, use a large bowl and a lightly oil'd spoon or lightly oiled hands to help keep the dough from sticking after you start mixing it together.


Mix everything until the ingredients are incorporated, it won't take too much mixing, just make sure all the flour is wet and the yeast is not clumped up together.

Dump out the dough into 2 greased loaf pans. Or you could do several mini loaf pans, or even a muffin tin. Whatever you prefer. I've baked this bread in everything from a cake pan, a muffin tin, and a traditional loaf pan and it always turns out.


Let the bread rise for 1 hour. keep it somewhere out of a breeze or slightly warmer to  help the yeast along. Let your oven preheat to 350 F.


Bake the loaves for about 30 minutes. They should be firm on top and have pulled away from the sides. At this point I pull them out and baste them with a little melted butter so that they are even more golden on top. Cook them for about 10 more minutes once you put the butter on top.


Once done let the bread cool for 10-15 minutes and then turn them out of the pans onto a cooling rack so the sides and bottom don't get soggy.

This bread is amazing if you eat it right away, but it also makes great toast throughout the week. I usually enjoy mine with my husbands homemade cinnamon honey butter.


To make the cinnamon honey butter take 1 stick of butter at room temperature and whisk it in your mixer until it is whipped. It is so important that you use room temperature butter. If you use melted butter the honey doesn't incorporate as good. And if the butter is frozen or refrigerated it will be too hard and break your whisk.

Once the butter is whipped (forming peaks) add honey and ground cinnamon to taste. You could also add a splash of vanilla depending on your preference. Whip all together until incorporated and make sure to taste it plenty along the way to see if you need more of anything. Store in an air tight container in your fridge.

I hope you guys enjoy.

Happy Baking!


Sunday, February 1, 2015

Breads and Spreads


This month on the blog I am going to be sharing my favorite breads and spreads. As this is the month of love what better way to show you care than to give someone special a loaf of warm goodness?

A lot of times baking bread can seem like a daunting task for an unexperienced baker. But with a few cardinal rules you will realize that baking your own bread is easy and not nearly as scary as some might think! I learned a lot about baking from my Mom growing up. She baked everything from sourdough cinnamon rolls, to baguettes, to pizza dough, to fancy wedding cakes for friends.

When I got to college I decided I wanted one of my minors to be Culinary Arts and one of my favorite classes I took was Baking. If you are ever looking for a great book, full of every type of bread recipe you could ever want to know I suggest Wayne Gisslen's Professional Baking book. I have the 5th edition, and it is like the bible of baking.


Bread is a really versatile tool in so many ways in the kitchen. You can turn stale bread into bread pudding, eat it plain, with butter, or make it the star of your meal.

Most all breads have the same basic chemical makeup: flour, salt, sugar, yeast, water.

One of the great things about bread is that you can add so many different ingredients to completely transform your dough into something new. From nuts, to fruit, to coca powder and peanut butter. Bread is one of the most versatile foods you can learn to make. There are literally endless possibilities.

Spreads are similar, I like to just dump in what sounds good based on the type of bread I'm eating, or even what time of day I'm eating it! From frosting, to flavored butter, to garlic and cheese, there is a spread for every bread.

I hope you enjoy this months recipes, they are some of my favorite!

Happy Eating!

Monday, January 26, 2015

Baked Mozzarella Sticks


One of my favorite appetizers since childhood has been Mozzarella sticks. That cheesy ooey gooeyness mixed with the crispy outside is so delightful! My favorite is when they are piping hot and the cheese juice just runs everywhere! 


Lots of brands make frozen versions of these amazing appetizers. But none of them are as good as fresh made at a restaurant.

I want to share with you my version of homemade Mozzarella sticks! They are so easy and great for kids to help make too. There are no measurements to this recipe. Just do as much of the ingredients as you want or need.  

Baked Mozzarella Sticks
Prep time - 15 minutes
Cook time - until golden and melty 

Ingredients:
Flour
Milk
Egg(s)
Breadcrumbs
Seasonings (Italian or Herbs du Province)
Mozzerella string cheese sticks

In three separate bowls put your flour, bread crumbs and seasoning, and milk and eggs. Slice your string cheese sticks in half then dunk as follows:

Make sure that on steps #2 & #3 that you coat the cheese completely in the flour and egg/milk mixture, this helps protect the cheese from oozing out during baking. If you are having trouble getting the flour or eggs to stick you can double dunk steps #2 and #3. Essentially doing two layers of each, flour then egg mixture, then more flour, then more egg mixture. It makes the coating a little thicker but if you are worried about your cheese melting out this will help create more of a barrier. 

Line them up on a baking sheet (I use foil to make clean up easier) and bake for approximately 20 minutes at 350 F. Or until golden and gooey. If you want a faster baking time you can bake at 400 F. However I suggest freezing them for a half hour prior so that the cheese doesn't run out anywhere. The lower temperature seems to keep them from melting too fast while the egg cooks. 


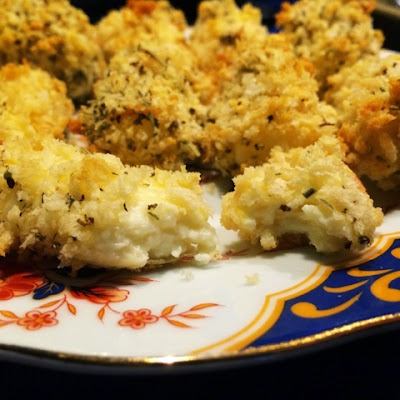
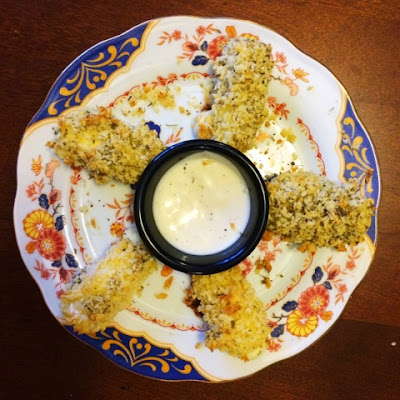
Serve with your favorite marinara or dipping sauce. These are so easy I was able to do most of it one handed while my 5 month old was teething! Make more than you think you need though because they are so delicious they will be gone before you know it!


Stay tuned for what's coming up next month! I am pretty excited about February's theme. I'll be announcing it on Feb 1 on the blog. 

Happy Eating!